
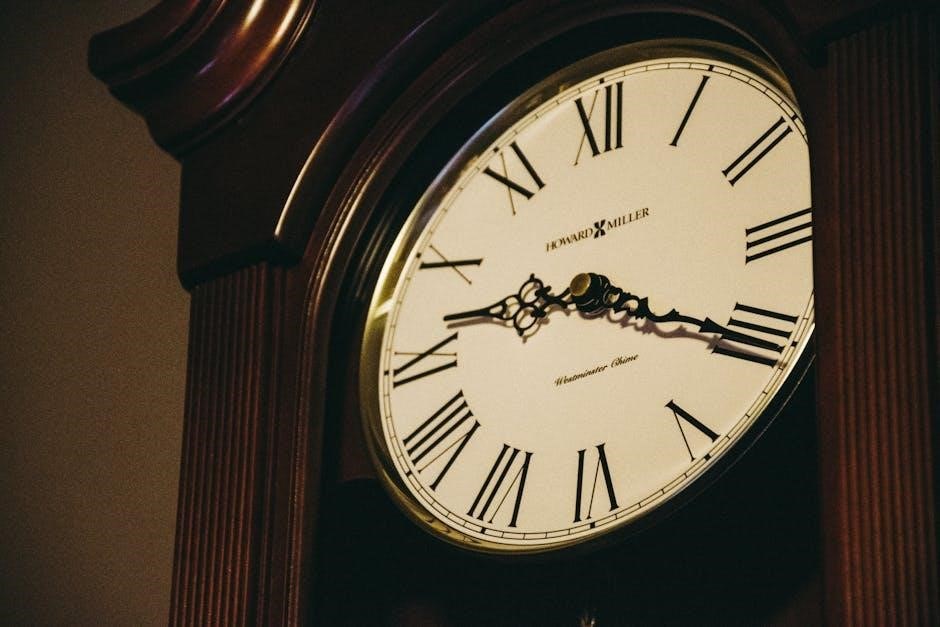
Howard Miller clocks are renowned for their exceptional craftsmanship, elegant designs, and precise timekeeping․ With a rich history, the brand offers a wide range of high-quality timepieces․
1․1 Overview of Howard Miller Clocks

Howard Miller clocks are renowned for their exceptional craftsmanship, elegant designs, and precise timekeeping․ They offer a wide range of timepieces, from traditional floor clocks to modern wall and mantel clocks․ Known for their durability and style, these clocks are crafted using high-quality materials like solid wood and intricate metalwork․ Many models feature advanced mechanisms, such as quartz movements, automatic timekeeping, and customizable chime settings․ Whether for home decor or as a heirloom, Howard Miller clocks blend traditional craftsmanship with modern innovation, ensuring they remain timeless pieces in any setting․
1․2 History and Reputation of Howard Miller
Howard Miller Clocks, founded by Howard Miller in 1926, has built a legacy of excellence in clockmaking․ Renowned for their precision engineering and timeless designs, the company has earned a reputation as a leader in the industry․ With a commitment to quality and innovation, Howard Miller clocks are crafted to last generations, offering both functional timekeeping and elegant home decor․ Their extensive range includes floor clocks, wall clocks, and mantel clocks, each reflecting a dedication to craftsmanship․ Trusted by clock enthusiasts worldwide, Howard Miller continues to uphold its heritage of producing exceptional timepieces that combine tradition with modern aesthetics․

Setting Up Your Howard Miller Clock
Unpack carefully, position in a stable location, and ensure the clock is level․ Remove packaging materials and secure the clock to prevent tipping for safe operation․
2․1 Unpacking and Initial Setup
Begin by carefully unpacking your Howard Miller clock from its shipping carton․ Inspect for any damage and ensure all components, such as keys, weights, and pendulum, are included․ Position the clock in a stable, level area to prevent tipping․ If your clock requires winding, locate the key provided in the packaging․ Remove any protective covering from the clock’s surfaces․ Ensure the clock is upright and balanced before proceeding with further setup․ This step is crucial for proper operation and to maintain the clock’s accuracy and aesthetic appeal․ Always refer to the manual for specific instructions tailored to your clock model․
2․2 Positioning and Leveling the Clock
Proper positioning and leveling are essential for your Howard Miller clock to function accurately․ Place the clock on a firm, stable surface, ensuring it is away from direct sunlight and heat sources․ Use a spirit level to confirm the clock is perfectly horizontal․ Adjust the leveling feet located at the base of the clock to achieve balance․ For floor clocks, ensure the clock is upright and secure to prevent tipping․ If your model includes a safety strap, attach it to a sturdy object for added stability․ Regularly check the clock’s level to maintain precise timekeeping and ensure the pendulum swings evenly․ Proper alignment guarantees optimal performance and longevity of your timepiece․
2․3 Understanding the Clock Components
Understanding the components of your Howard Miller clock is crucial for proper setup and maintenance․ Key components include the pendulum, which regulates timekeeping, and weights, which power the clock’s movement․ The dial displays the time, with hour and minute hands, while chime rods produce the melodic sounds․ The movement, housed in the clock, consists of gears and springs that power the timepiece․ Some models feature automatic nighttime shutoff or volume control for chimes․ Familiarize yourself with these parts to ensure optimal performance․ Refer to your manual for specific details, as components may vary depending on the clock model and type, such as mechanical or quartz movements․

Operating Instructions
Operating your Howard Miller clock involves winding, setting the time, and adjusting components like the pendulum for accurate timekeeping․ Regular maintenance ensures smooth functionality and longevity․
3․1 Winding the Clock
Winding your Howard Miller clock is essential for maintaining its mechanical movement․ Begin by inserting the provided winding key into the keyhole․ Turn the key clockwise, winding each weight fully; For weight-driven clocks, wind once weekly, while spring-driven models may require winding every 7-14 days․ Ensure not to over-wind, as this could damage the mechanism․ For quartz models, winding is unnecessary; simply replace the batteries as needed․ Always follow the manual’s specific instructions for your clock type․ Proper winding ensures accurate timekeeping and extends the clock’s lifespan․ Avoid winding backward to prevent internal damage․ Regular winding maintains the clock’s performance and elegance․
3․2 Setting the Time and Date
Setting the time and date on your Howard Miller clock is a straightforward process․ For mechanical clocks, move the minute hand clockwise to the desired time․ Adjust the hour hand separately if necessary․ For quartz models, use the buttons or dials provided․ Ensure the clock is fully wound before setting․ The date dial, located on the back, should be turned clockwise to set the date․ Avoid moving hands counterclockwise to prevent damage․ If your clock has chime features, synchronize them with the time for proper operation․ Refer to your manual for specific instructions, as models may vary․ Accurate time and date settings ensure optimal performance and functionality․ Regular checks maintain precision․ Always follow manual guidelines for correct adjustments․ Proper synchronization enhances the clock’s features․
3․3 Adjusting the Pendulum
Adjusting the pendulum ensures accurate timekeeping for your Howard Miller clock․ Locate the pendulum at the bottom of the movement․ Gently turn the adjustment nut at the end of the pendulum․ Clockwise turns speed up the time, while counterclockwise turns slow it down․ Use the key provided to level the clock, as an uneven surface can affect pendulum accuracy․ After adjustment, observe the clock for 24 hours to ensure precise timekeeping․ Avoid over-adjusting, as this can cause inconsistency․ The pendulum’s smooth swing is essential for maintaining rhythm․ Regular checks and minor adjustments will keep your clock running accurately․ Proper care extends the clock’s longevity․
Maintenance and Care
Regular winding, gentle cleaning, and occasional lubrication of moving parts ensure optimal performance and longevity of your Howard Miller clock․
4․1 Cleaning the Clock
Cleaning your Howard Miller clock is essential to maintain its appearance and functionality․ Use a soft, dry cloth to gently wipe the clock’s exterior, removing dust and dirt․ For more thorough cleaning, lightly dampen the cloth with water, but avoid harsh chemicals or abrasive materials that could damage the finish․ Regular cleaning prevents dust buildup, which can affect the clock’s internal mechanisms․ Avoid touching the clock’s surfaces excessively, as oils from skin can leave marks․ For intricate carvings or delicate areas, use a clean, small-bristle brush․ Always follow the manufacturer’s guidelines for specific materials, such as polished brass or wooden finishes․ Cleaning ensures your clock remains a beautiful and functional piece for years․
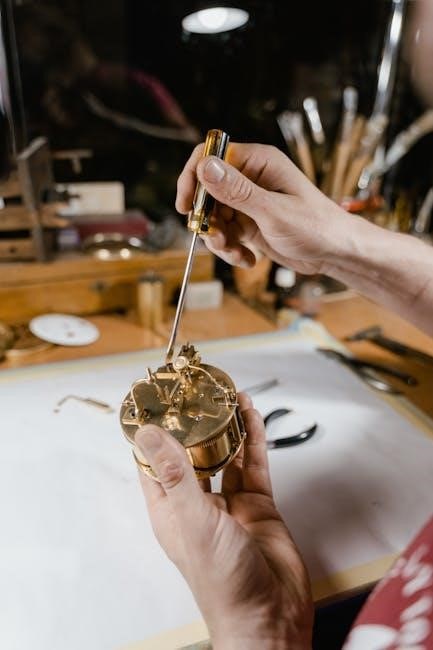
4․2 Lubricating the Movement
Lubricating the movement of your Howard Miller clock is crucial for maintaining its smooth operation․ For mechanical clocks, apply a high-quality silicone-based clock oil every 2-3 years․ Place a small drop on the pivot points of the gears, ensuring not to over-lubricate․ Avoid using household oils, as they can degrade the movement․ After lubrication, gently move the gears to distribute the oil evenly․ Proper lubrication prevents friction and wear, ensuring accurate timekeeping․ Always refer to the instruction manual for specific guidance, as improper lubrication can damage the mechanism․ Regular maintenance extends the clock’s lifespan and preserves its performance․
4․3 Storing the Clock
Proper storage of your Howard Miller clock is essential to preserve its condition and functionality․ Before storing, ensure the clock is wound down and the pendulum is stationary․ Remove any batteries to prevent corrosion․ Wrap the clock in a soft, protective cloth to avoid scratches and dust․ Store it in a dry, climate-controlled environment, away from direct sunlight and humidity․ Avoid stacking items on top of the clock to prevent damage․ If storing for an extended period, consider placing the clock in its original packaging or a sturdy box․ Proper storage maintains the clock’s integrity and ensures it remains functional when rediscovered․
Troubleshooting Common Issues
Address common problems like inaccurate timekeeping, non-working chimes, or malfunctioning pendulums by checking the clock’s alignment, ensuring proper winding, and verifying weight functionality․ Regular maintenance helps prevent issues․

5․1 Clock Not Keeping Accurate Time
If your Howard Miller clock isn’t keeping accurate time, check the pendulum alignment and ensure it’s swinging evenly․ Verify the clock is level and properly positioned․ Environmental factors like temperature changes or vibrations can affect accuracy․ For mechanical clocks, ensure the weights are hung correctly and the pendulum is adjusted properly․ Quartz models may require new batteries or synchronization with an atomic signal․ Refer to the manual for specific calibration instructions; Regular maintenance, such as lubricating the movement, can also help improve timekeeping precision․ If issues persist, consult the troubleshooting guide or contact Howard Miller support for assistance․
5․2 Chimes Not Working Properly
If your Howard Miller clock’s chimes are not working, ensure the chime setting is enabled and the volume is adjusted correctly․ Check if the clock is set to silent mode or if the chime selector is in the correct position․ For mechanical clocks, verify that the chime rods are properly aligned and not obstructed․ Ensure the clock is wound sufficiently, as low power can disable chimes․ For quartz models, replace the batteries if necessary․ Consult the manual for specific chime activation instructions․ If issues persist, inspect the chime mechanism for damage or misalignment․ Contact Howard Miller support for further assistance or repair options․
5․3 Pendulum or Weights Not Functioning
If the pendulum or weights in your Howard Miller clock stop working, first ensure the clock is level and stable․ Check that the pendulum is swinging freely and not obstructed․ For weight-driven clocks, verify that the weights are properly aligned and not touching the floor or sides; Gently lift and release the pendulum to restart its motion․ Ensure the clock is wound adequately, as insufficient winding can stop the pendulum or weights․ Avoid over-oiling the movement․ If issues persist, consult the instruction manual or contact Howard Miller support for professional assistance․ Proper functioning of these components is essential for accurate timekeeping and smooth operation․
Product Manuals and Resources
Howard Miller provides comprehensive product manuals and resources online, including setup guides, troubleshooting tips, and warranty information․ Visit their official website or authorized retailers for easy access․
6․1 Accessing the Instruction Manual Online
To access the Howard Miller clock instruction manual online, visit their official website and navigate to the “Support” or “Resources” section․ From there, you can search for your specific clock model and download the PDF manual․ Many authorized retailers also provide access to these manuals on their websites․ Ensure to enter the correct model number for accurate results․ The manuals typically include detailed setup guides, troubleshooting tips, and maintenance instructions․ If you cannot find the manual online, contact Howard Miller’s customer support for assistance․ This ensures you have all the necessary information to operate and maintain your clock effectively․
6․2 Understanding the Warranty and Support
Howard Miller clocks are backed by a comprehensive warranty that covers manufacturing defects and ensures quality․ The standard warranty period varies by model, typically ranging from two to five years․ To validate your warranty, register your clock on Howard Miller’s official website within 30 days of purchase․ For assistance, contact their customer support via phone, email, or through the website․ The warranty does not cover damage caused by improper use or maintenance․ Refer to your instruction manual for specific warranty terms and conditions․ Howard Miller also offers dedicated support centers to address any concerns, ensuring your clock remains functional and accurate for years to come․
6․3 Additional Online Resources
Beyond the instruction manual, Howard Miller offers extensive online resources to enhance your ownership experience․ Their official website provides downloadable PDF manuals, troubleshooting guides, and video tutorials for setup and maintenance․ Additionally, the site features a comprehensive FAQ section addressing common queries about operation and care․ Registered users can access exclusive content, including product updates and tips for optimizing their clock’s performance․ Howard Miller also partners with authorized retailers like 1-800-4CLOCKS to offer detailed product guides and support․ These resources ensure you have all the tools needed to maintain and enjoy your timepiece for years to come, ensuring optimal functionality and elegance in your home․

Advanced Features
Howard Miller clocks offer advanced features such as Quartz movements for precision, automatic timekeeping for convenience, and customizable chime settings for personalization․
7․1 Understanding Quartz Movements
Howard Miller clocks equipped with Quartz movements offer exceptional accuracy and reliability․ These movements are battery-powered, eliminating the need for winding․ Quartz crystals vibrate at a precise frequency when an electric current is applied, ensuring consistent timekeeping․ This technology is low-maintenance and resistant to environmental factors like temperature changes․ Models such as the Howard Miller 625-205 Accuwave DS Clock utilize Quartz movements for dependable performance․ The Quartz movement is also energy-efficient, with battery life lasting several years․ For setup, ensure the clock receives a clear signal or manually adjust if necessary․ This feature enhances the overall functionality and elegance of Howard Miller timepieces, making them a practical choice for any home․ Clocks with Quartz movements are ideal for those seeking precision and convenience․
7․2 Setting Up Automatic Timekeeping
Setting up automatic timekeeping on your Howard Miller clock ensures precise synchronization with atomic clocks․ Place the clock near a window for optimal signal reception․ Insert the battery, and the clock will automatically search for the signal․ If the signal is weak, move the clock to a different location․ For manual setup, remove the battery for 30 seconds, then reinstall it to reset the system․ Models like the 625-205 Accuwave DS Clock offer automatic timekeeping with daylight saving adjustments․ Ensure the clock is level and stable for accurate performance․ Follow these steps to enjoy reliable, hands-free timekeeping and maintain the elegance of your Howard Miller clock․ Proper setup guarantees flawless operation and timeless appeal․
7․3 Customizing Chime Settings
Customizing chime settings on your Howard Miller clock allows you to personalize the sound and timing of the chimes․ Models like the 625-205 Accuwave DS Clock feature automatic chime adjustments, while others require manual setup․ Use the control panel or buttons to select from various chime options, such as Westminster or Ave Maria․ Adjust the volume to your preference using the dial or button․ Some clocks also allow disabling chimes during specific hours․ For manual adjustments, refer to the instruction manual for guidance․ Proper customization ensures your clock enhances your home’s ambiance while maintaining precise timekeeping․ Explore the settings to find the perfect balance of sound and functionality․